Create an Extension in the UI
The fastest way to build an extension is the guided Create builder: four steps in the app, no code, and the result is a working, read-only connector for any JSON HTTP API. This page walks every step and every field. (Prefer to write the connector yourself? See Build Your First Extension — the two ways are compared in the overview.)
Every field in the builder has a ? next to its label — click it for a detailed explanation with examples, right in the app. This page follows the same order.
The worked example
We'll build a connector for the public GitHub REST API that looks up a user profile, so you can follow along and test with real responses — no key required:
- API:
https://api.github.com - Endpoint:
GET /users/{username}(e.g./users/torvalds) - Tool:
github_get_user— the model passes ausername, gets JSON back.
The same steps apply unchanged to an internal CMDB, a status page, a deploy tracker, or any other JSON-over-HTTP service.
Open the builder
On the Extensions page, click Create. The builder opens with a step indicator: Basics → Auth → Data → Review. Each step validates when you click Next, so mistakes surface next to the field that caused them — the same checks the app applies when it generates the extension.
Step 1 — Basics
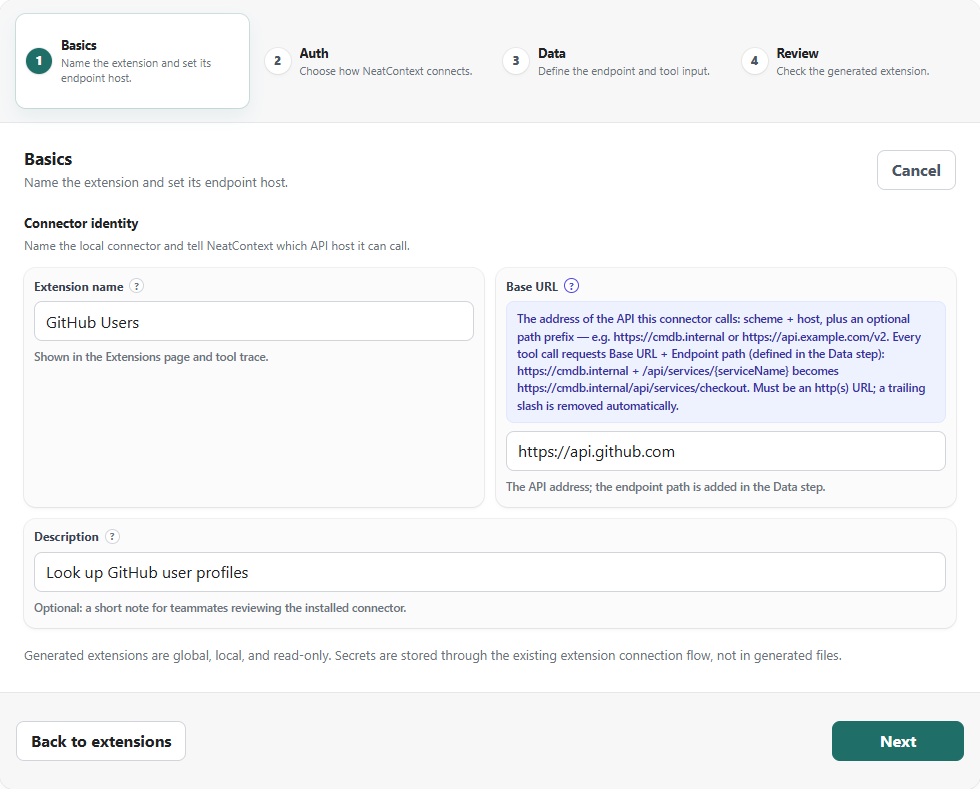
| Field | What to enter |
|---|---|
| Extension name | A display name, e.g. GitHub Users. Shown on the Extensions page and in the Context activity log when the tool runs; also becomes the generated folder's name (github-users). No effect on API calls. |
| Base URL | The address of the API: scheme + host, plus an optional path prefix — https://api.github.com, or e.g. https://api.example.com/v2. Every tool call requests Base URL + Endpoint path (Step 3). Must be http(s); a trailing slash is removed for you. |
| Description | Optional. A short note shown on the extension's card, e.g. Look up GitHub user profiles. |
For our example: name GitHub Users, base URL https://api.github.com,
description Look up GitHub user profiles. Click Next.
Step 2 — Auth
Choose how the API authenticates requests. Whatever you pick, secrets are never written into the generated files — they're entered later on the extension card, encrypted with your OS secure storage, and handed to the connector only when a tool runs.
- No auth — the API is reachable without credentials (a public API like our example, or an internal service already protected by the network). Nothing else to fill in.
- API key — you'll paste a token that is sent as an HTTP header on every request.
- OAuth2 PKCE — the service supports browser sign-in for public clients.
Our GitHub example uses No auth — pick it and skip to Step 3. The two authenticated modes look like this:
If you pick API key
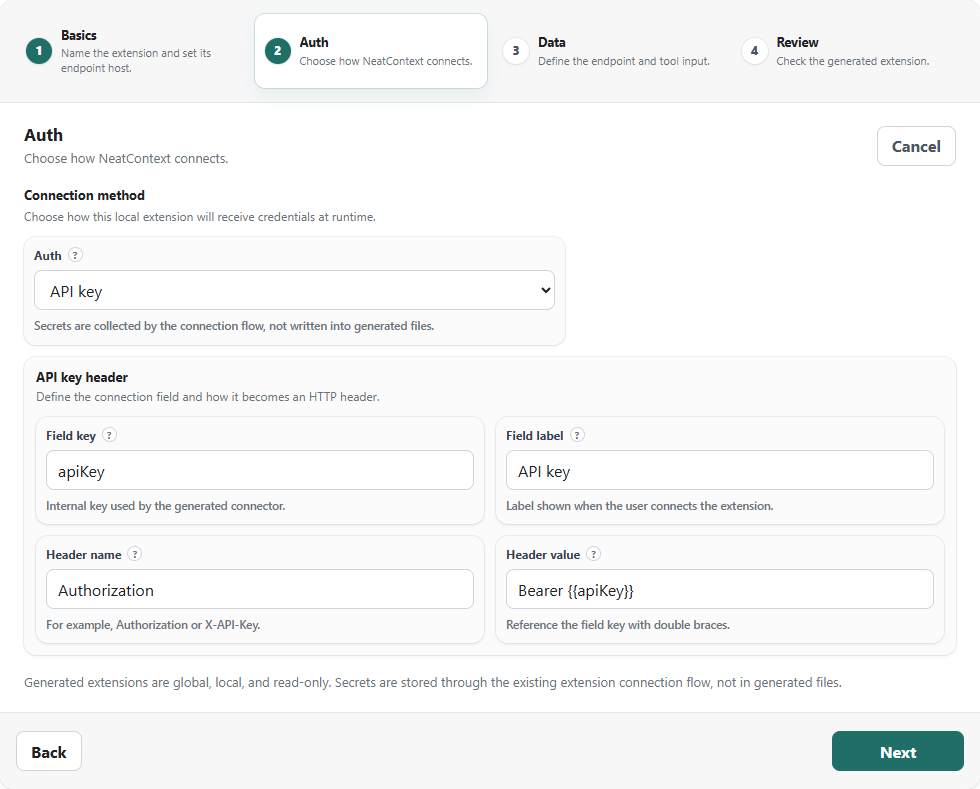
| Field | What to enter |
|---|---|
| Field key | An internal identifier for the secret, e.g. apiKey. The header template references it as {{apiKey}}. Users never see it. |
| Field label | The label on the Connect form, e.g. API key or Service token — use the provider's own name for the credential. |
| Header name | The header that carries the key, from the API docs — commonly Authorization or X-API-Key. |
| Header value | How the header value wraps your key: Bearer {{apiKey}} sends Authorization: Bearer <key>; plain {{apiKey}} sends the key alone. Check which shape the API expects. |
The defaults (apiKey / Authorization / Bearer {{apiKey}}) fit most
bearer-token APIs — often you only need to confirm them.
If you pick OAuth2 PKCE
| Field | What to enter |
|---|---|
| Authorize URL | The provider's browser authorization endpoint, from its OAuth docs. |
| Token URL | The provider's token endpoint; used locally to exchange and refresh tokens. |
| Client ID | The id of an OAuth app you register with the provider as a public / PKCE client — no client secret is needed or stored. |
| Scopes | Permissions to request, space- or comma-separated. Prefer the narrowest read-only scopes. |
| Redirect port | A free local port for the one-time sign-in callback. In the provider's OAuth app, register the redirect URL http://127.0.0.1:<port>/oauth/<extension-id>/callback, where <extension-id> is your extension name lowercased with dashes (GitHub Users → github-users). |
Step 3 — Data
Define the one read-only operation the tool performs.
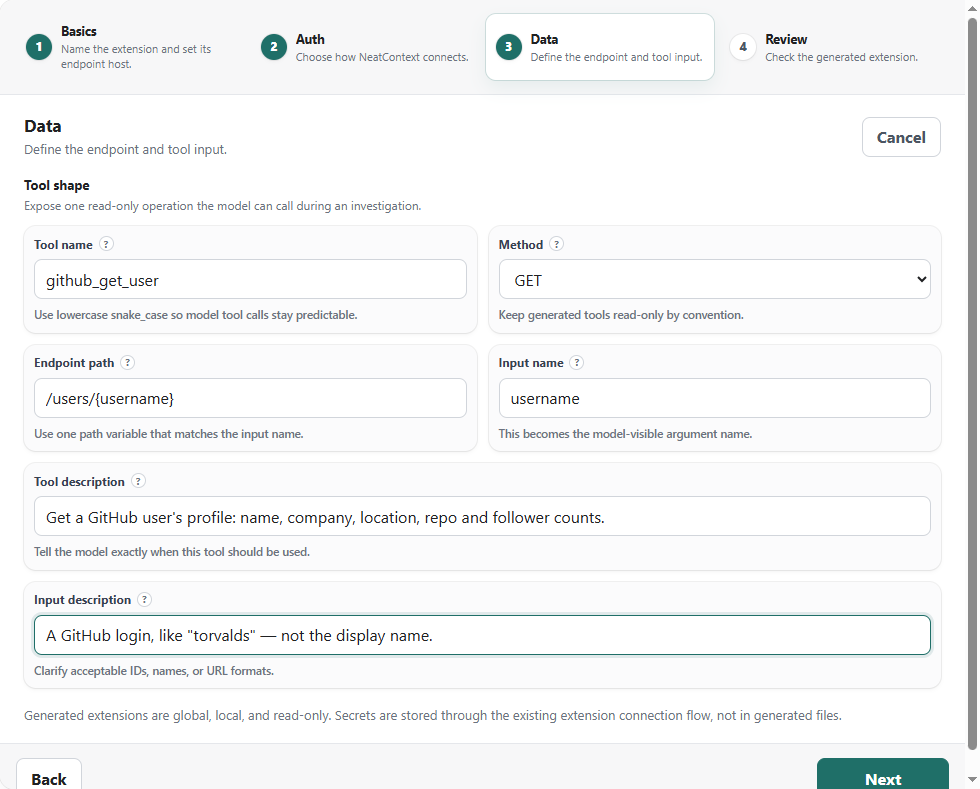
| Field | What to enter |
|---|---|
| Tool name | The function name the model calls: github_get_user. Lowercase letters, numbers, underscores; start with a letter. (neatcontext_* is reserved for built-ins.) |
| Method | GET for reading (recommended). POST only if the API requires it — the input is then sent as a JSON body. |
| Endpoint path | The path under the base URL, starting with /. Put the input into the URL with a placeholder that exactly matches the input name: /users/{username}. With no placeholder, a GET sends the input as ?username=... and a POST puts it in the body. |
| Input name | The single argument the model fills in: username. Must match the {placeholder} if the path uses one. |
| Tool description | Tell the model when to use the tool and what it returns: Get a GitHub user's profile: name, company, location, repo and follower counts. The model picks tools by this text — be specific. |
| Input description | What values are valid: A GitHub login, like "torvalds" — not the display name. |
The model decides whether to call your tool from the tool description, and what to pass from the input description. Vague text here is the most common reason a working connector never gets called.
Step 4 — Review and generate
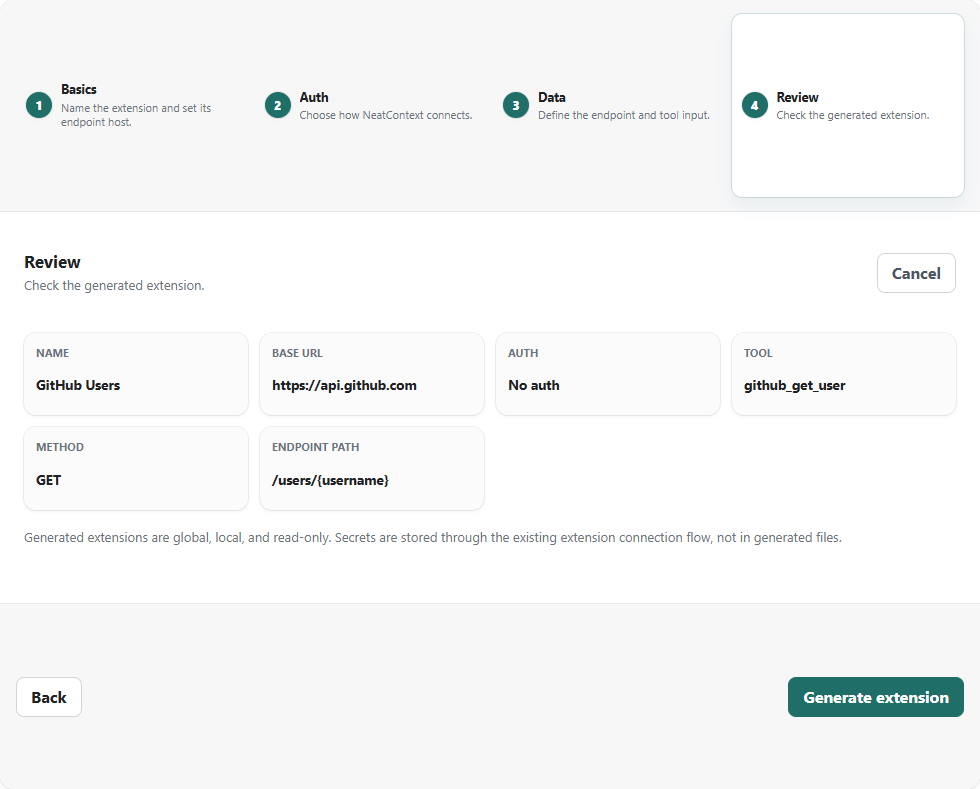
Check the summary — name, base URL, auth, tool, method, endpoint — then click
Generate extension. NeatContext writes a complete extension folder (a
manifest, an http-connector.json describing your endpoint, and a server.cjs
MCP server), installs it, and returns you to the Extensions page with the new
card enabled.
Try it
-
If the extension needs credentials, fill the Connect form (API key) or click Connect (OAuth) on its card.
-
Select the extension into a Context, connect your AI client, and ask something that needs the tool:
What company does the GitHub user torvalds work for?
The Context's activity log shows
github_get_userrunning, and the answer comes from the live API response.
Growing beyond the builder
The generated folder is a normal extension — click the folder icon on the
card to open it. server.cjs is a single readable file: a natural starting
point when you outgrow one tool per extension or need custom logic. From
there, continue with Build Your First Extension
and the manifest reference.